roast chicken
There are plenty of stories that I could share with you about roast chicken. My memories of eating it as a child, as an adult, and in-between – are plentiful. But that’s really neither here nor there, and would be distracting to the missive – you need to make this. Soon. As soon as possible, in fact. And I want to tell you that there is a way to get your roast chicken perfect every time. In fact, this chicken sort of just cooks on its own with very little hands-on work. You know, I am having a hard time writing this post. I think what I want to say to you is this.
There is nothing more perfect than a perfectly roasted chicken.
Nothing more sublime. Nothing more attainable, accessible, every-day-comforting and yet luxurious and decadent. It’s the alpha and the omega of meals. It’s a meal fit for a regular-weeknight supper or a festive, celebratory feast. It’s like that amazingly, fabulous pair of jeans hanging in your closet. An every day must-have, that’s also great for a fabulous night on the town. And just as a pair of jeans is an essential wardrobe staple, roast chicken is its kitchen equivalent. It’s a classic everyone should master. And it is easier to make than you think.
I have, in my lifetime, attempted my hand at roast chicken with as much success as failure. I finally figured out a few things that, I think, make a nearly fool-proof system of getting your chicken just perfect every time. Besides this method, what it takes is just a few times’ making it. Getting a feel for the bird, for the roasting process, getting some courage in calling it when it’s done. Courage is huge here. I mentioned once that pie crust smells fear. I think it’s kind of true for cooking food in general. Or attempting something new. That something will intrinsically know your fear, so I suggest just charging on. What’s the worst think that can happen? You will eat a peanut butter and jelly sandwich for dinner – and is that such a bad thing?
Here are some of my thoughts on roasting a chicken.
First off, you want your chicken to be on the smaller side. You want that magic perfect proportion of skin to meat, i.e. fat to leaner meat. More fat equals tastier chicken. Also, more moist chicken, since this fat will guard your chicken from drying up. Larger chickens are, well, larger, and so somehow that fat distribution doesn’t quite work. So aim for a chicken between 2 1/2 and 3 1/2 pounds.
Secondly, it would help you a great deal if you prepped the chicken one to two days in advance. This means, salting it, putting appropriate herbs and whatnot, and letting it sit in the fridge, covered, absorbing this lovely salt. It’s really worth it.
Third, high temperature, is your friend. In fact, it is your right hand man when it comes to roasting a chicken. Don’t fear it, thinking that it’ll render your chicken dry. It won’t. I promise. In fact, you’ll be amazed what blasting your chicken with such high temperatures will do for the bird. It will melt in your mouth. It will not taste like pressed wood composite.
Fourth, you want to make sure that before you place the chicken in the oven you want to make sure it is as dry as possible. Dry chicken means it will get crispy and sizzle. Wet chicken means, it’ll steam and steamed chicken isn’t nearly as exciting-sounding or tasting as roasted chicken. Don’t you think?
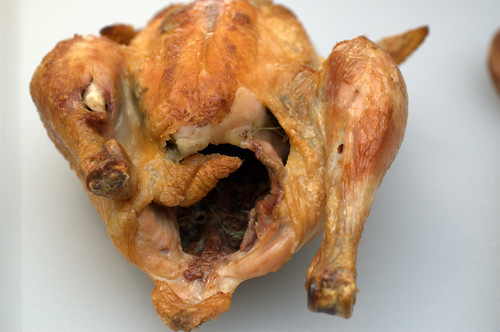
Finally, and just as importantly, once your chicken is done, you want to let it rest. Give it about 15 minutes so that it absorbs the juices and hangs out for a bit. Besides, after pulling it out of the oven, you’ll be compelled to pull up a chair and admire it – it will be terribly pretty to look at (and even better to eat, when you get around to it)!
But don’t admire it too long – you’ll have hungry guests and a meal is best admired when it is consumed and savored.
Classic Roast Chicken
Ingredients:
1 small chicken about 2 3/4 – 3 1/2 pounds
a few sprigs of thyme, rosemary, or sage, or a combination
salt
1 cup white wine
1 shallot, finely minced
Preparation:
Two days before:
Wash your chicken and dry it very thoroughly inside and out. The drier the chicken – the better the results! Find the lump of fat inside the chicken and remove that. You can either toss it or make rendered chicken fat (aka schmaltz) to use on home-fried potatoes some time later. (It might not be good for you, but it’s UBER tasty!)
With your index and middle finger, make a pocket on each side of the breast. You do this by sliding your fingers between the meat and the skin and gently pushing them apart. Do the same with the thick part of the drumstick also. Shove a sprig of an herb of your choice into these pockets.
Season the chicken liberally with salt. You can also use pepper, but I found my results were tastier with salt. In any case, make sure to season the thicker parts more than the bonier ones (like wings and ends of the drumstick). Sprinkle some salt inside the cavity and drop a little sprig of an herb inside. It does wonders.
Cover the chicken loosely and let sit in the refrigerator for 1-2 days.
The day of:
Preheat your oven to 450 degrees Fahrenheit.
Choose an oven-proof shallow dish slightly bigger than the chicken. Here’s what I suggest. Get thee a Lodge cast iron pan. With proper care (which isn’t onerous) you can have this last you your whole life. [I have visions of showing my grandchildren the pan I’ve made so many dishes in, that has so much history, but I digress.] My pan is about 10-inches. With it you can make tarte tatin, roast a chicken, make skillet eggs, and so on.
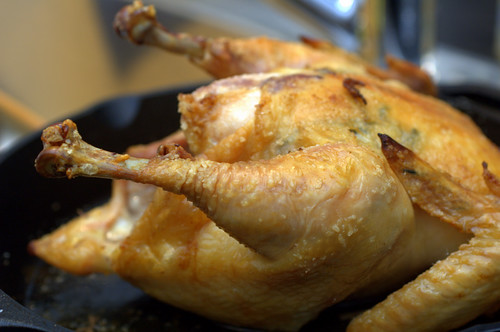
It will help you if, before placing your chicken inside this pan, you heat the pan on the stove (trick from my grandmother) and then place the chicken on top of it. Be sure that the chicken is dry. If a little moisture collects on it from being salted and in the refrigerator, dry those spots. You want a dry chicken, keep remembering that. A chicken, placed atop a hot pan breast side up, will sizzle, upon which you will open your oven (which will be preheated by then) and thrust your chicken inside it.
Roast the chicken for roughly 20 minutes and make sure that it surface begins to brown. Raise the temperature a bit if it doesn’t, but at 450 degrees, you should see something happening. You will also hear a fabulous crackling noise emanating from the oven. This is your sign – the chicken is roasting!
After roasting the bird for 30-35 minutes, open the oven and quickly flip it over. Quickly as not to lose any of the valuable heat in the oven, but not so quickly that you hurt yourself with the sputtering drippings. Just take care to be careful, that’s all.
After 15 minutes, flip the chicken over again and finish it for another 10 minutes or so. You might want to test the chicken, by cutting a fatter portion of the thigh and making sure that the juices are running clear.
Once the chicken is done, remove it from the oven, turn off the heat. Set the chicken on a serving platter, a board, a plate to cool off.
Making the gravy:
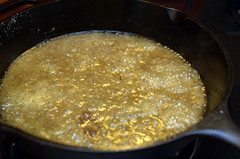
Take your roasting pan with all the drippings and set it on top of the stove on medium heat. Add the shallot to it and cook until shallots are turning golden brown. Add th wine, bring to a boil and reduce by half. The process should take exactly the same amount of time as your chicken needs to cool off a bit. Isn’t that just lovely, how it all works out?
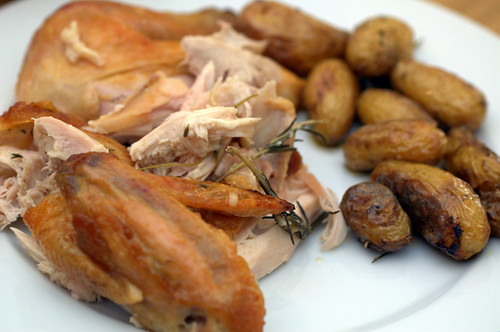
Carve and serve the chicken with your white-wine shallot gravy. I guarantee you, there will be no leftovers.


Irene
I totally agree, totally – a perfectly roasted chicken is really one of the best things ever. It’s my perfect comfort food. My husband loves it with garlic, herbes de Provence and a spritz of olive oil. Can’t wait to try this version with the gravy – shallots, white wine and chicken sounds amazing!
SFRobert
I concur – roast chicken is one of the simplest, yet magical things of the culinary world; and, after the flesh is gone, the bones/carcass makes a wonderful dark stock for soup, risotto, different pilafs. Ah, bliss…
dave
This is a really good method which has been giving me great chicken for a few years. It is, essentially, Judy Rodger’s recipe from the Zuni Café Cookbook (You’ll find it reprinted and discussed ad infinitum online).
radish
I’ve heard of this recipe. I know Deb on Smitten Kitchen did it. I actually don’t own the book, but should. My grandmother has been roasting chicken this way for as long as I remember.
Kira
Yum!
One way to get a dry chicken before roasting (I use this method after brining) is to leave the chicken in the fridge uncovered for 8 hours. Fridge air dries things out. This helps get the crispiest skin!
Josie
Wow you made my mouth water with that post and those pictures. I never thought I liked chicken skin until I had a perfectly roasted chicken… so incredibly delicious!
Kitchen Butterfly
Yummy. Lovely piccies. Its brekkie time in Europe but I’m hungry for some chicken. Maybe the full English would do
Karine
Your roast chicken looks delicious! And thanks for the tips on how to prepare it :)
Winnie
Beautiful looking chicken.
I love perfectly roasted chicken- so simple and delicious!
I’ve never paid much attention to drying the chicken before- will try this next time!
Your potatoes look fabulous, too!
Adrienne
I’ve been making this chicken for a few years now (comes of reading the Zuni Cafe cookbook and Bouchon), but hadn’t thought to put the herbs or to make the gravy. So.
a) I concur. This chicken is a miracle. It always, always works, and it is ridiculously, gorgeously delicious.
and also
b) Oh boy! I need to go find a small chicken! I want to try with gravy!!! Thank you!
Greg
Preheating the skillet is definitely a good idea.
zenchef
mmmm.. A nice roast chicken. Comfort food at it’s best!
I remember watching an interview of Thomas Keller in which he got asked what is his favorite dish, sure enough, he answered a simple roast chicken.
Love the little fingerling potatoes as well.
NuJoi
Roasted chicken is one of those things you tend to take for granted – until you eat one that wasn’t quite right. Yours looks wonderful.
KT
What an amazing recipe! Made this tonight and I couldn’t stop eating it. Thanks for sharing :)
annie
Okay; I have a recipe or roast chicken that I’ve used for years, and it’s okay…but just “okay.” You had me at the pictures, and I am making my next chicken this way. We like the crispy, we like the gravy, I think it will be a hit. Thanks for this!!
Emily
Let’s see… it just came out of the oven 30 minutes ago and half of my baby bird is demolished. Yes, that’s a winner!
One big issue I had was that my All-Clad pan completely stuck. I debated oiling it since I don’t own a cast iron pan to use (for shame, I know!). The skin stuck pretty badly, but I just scraped it up as best I could and enjoyed the little globs of cooked skin. (Mmmm chicken skin.) Do you suggest oiling the pan if it’s not cast-iron for the next go-around?
I made the gravy from about 2/3 cup chicken broth, 1/3 cup dry vermouth and a leek since that’s what I had and yum. I mainly just spooned the leeks onto the chicken I was eating standing over the cutting board today, but I look forward to having it more properly plated for dinner! Thanks for another delicious recipe! (The 2 day salting was worth the wait.)