linzer cookies
You know I sometimes forget that what I consider utter and sublime perfection might not be that sublime or perfect for someone else. It never ceases to amaze me though, because I, ignorantly, like to think of bliss as universal and indisputable, but of course, that’s never true. For example those cookies that sent me into sheer cookie heaven, were not even remotely blissful for KS. In fact, he confessed a few days ago, to not even liking them in the least – he preferred those cookies instead. Sacrilege as it may be to proclaim a dark, deeply rich, chocolate cookie as untasty; it does remind me that what’s good for the goose, isn’t necessarily goose for the gander. So the quest to make a cookie for KS that he’d like, nay, love was on – big time.
So there’s a little place we like to have brunch at, Kitchenette – it’s got a homey feel with country style brunches, neverending servings of grits, home made biscuits with strawberry butter and breakfast enchiladas that I can’t get enough of. Orange juice comes in Mason jars, tables are made of painted doors with glass tops. It’s a little bit of South, or at least the feeling of it anyway, crammed into a tiny Tribeca space. And upon entering the first thing you see are these decadent cookies piled on cake stands – peanut butter cookie sandwiches, macaroons and Linzer cookies. And it’s the Linzer that caught KS attention.
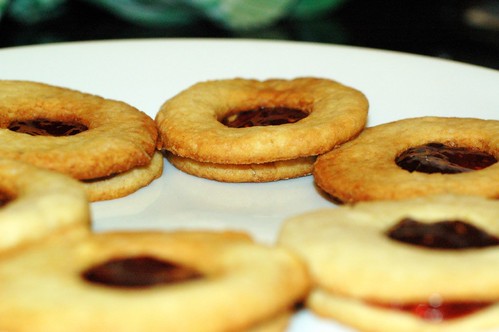
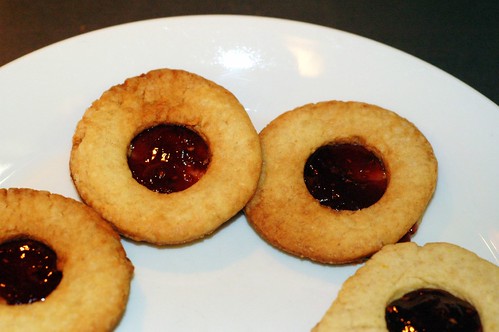
I’ve always liked a good Linzer cookie, but the whole construction of them scared me off a bit. This isn’t some drop cookie that you just let back and then enjoy. This involves using a cookie form, then making an additional hole in half the cookie disks, then baking, then cooling. And finally dropping a generous dollop of raspberry jam on a whole piece and put the holey piece on top. There, now that I’ve written it, it doesn’t seem that bad at all, but for some reason, in my head, when I thought about it – whoa, that’s a lot of steps.
Given my recent baking, um, endeavors so to speak I was a bit apprehensive about giving this cookie dough a go. First I failed at pie dough and then, as if that wasn’t enough, the upside-down plum cake visual appearance gave me nightmares for awhile. The humidity today made me particularly nervous – because I’ve been told humidity and dough are not friends. But I was not to be deterred, weather or not.
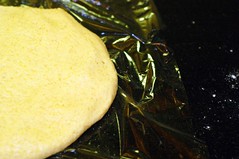
The dough did give me some trouble – after I chilled it and was trying to roll it, it went all kinds of broken on me. Too sticky, too unpliable, it was holding on to the granite for dear life, until I sprinkled enough flour on it to make it work with me – which means for all you out there, if you try this recipe – do not dismay if your dough doesn’t cooperate. There is a way to fix it! Also, if you roll the dough between the two sheets of plastic wrap, it tends to work better.
Also, we didn’t have hazelnuts as the recipe require, so I used pine nuts instead, which didn’t hurt the end results at all.
And finally, do not dismay if you don’t have the fancy forms for your cookie cut-outs. I didn’t – and used a small metal cup for the outline, and a tiny kettle top to get the small circles out for the tops of my cookies. In a way, it made the cookie construction that much more fun, albeit, they didn’t have that perfect Linzer look. Still, they tasted pretty heavenly to me and to KS. I guess there’s a cookie we can both agree on, even though it doesn’t involve chocolate.
Adapted from Epicurious.com
Makes about 2 dozen cookies.
Ingredients:
2/3 cup hazelnuts (3 oz) or pine nuts
1/2 cup packed light brown sugar
2 1/2 cups all-purpose flour
1/2 teaspoon baking powder
1/2 teaspoon salt
1/4 teaspoon cinnamon
2 sticks (1 cup) unsalted butter, softened
1 large egg
1 teaspoon vanilla
1 12-oz jar seedless raspberry jam
Special equipment: a 2- to 2 1/4-inch fluted round cookie cutter and assorted 1/2-inch shaped cookie cutters or aspic cutters.
Method:
Put oven rack in middle position and preheat oven to 350°F.
Toast hazelnuts in a shallow baking pan until fragrant and skins begin to loosen, about 6 minutes. Rub nuts in a kitchen towel to remove any loose skins (some skins may not come off), then cool to room temperature.
Pulse nuts and 1/4 cup brown sugar in a food processor until nuts are finely ground.
Whisk together flour, baking powder, salt, and cinnamon in a small bowl.
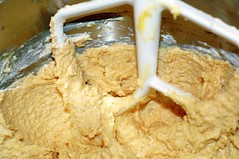
Beat together butter and remaining 1/4 cup brown sugar in a large bowl with an electric mixer at medium-high speed until pale and fluffy, about 3 minutes in a stand mixer (preferably fitted with paddle) or 6 minutes with a handheld. Add nut mixture and beat until combined well, about 1 minute. Beat in egg and vanilla. Reduce speed to low and add flour mixture, mixing until just combined.
With floured hands, form dough into 2 balls and flatten each into a 5-inch disk. Chill disks, wrapped in plastic wrap, until firm, at least 2 hours.
Put oven racks in upper and lower thirds of oven and preheat oven to 350°F.
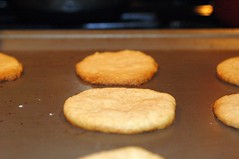
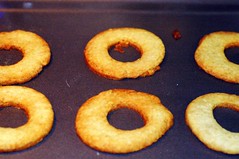
Roll out 1 disk of dough into an 11-inch round (1/8 inch thick) between 2 sheets of wax paper (keep remaining dough chilled). If dough becomes too soft to roll out, rewrap in plastic and chill until firm. Cut out as many cookies as possible from dough with larger cookie cutter and transfer to 2 ungreased large baking sheets, arranging about 1 inch apart. Using smaller cutters, cut out centers from half of the cookies, reserving centers and rerolling along with scraps (reroll only once).* Bake cookies, switching position of sheets halfway through baking, until edges are golden, 10 to 15 minutes total, then transfer with a metal spatula to racks to cool completely. Make more cookies from second disk.
Spread about 1 teaspoon jam on flat side of 1 solid cookie and sandwich jam with flat side of 1 windowed cookie. Sandwich remaining cookies in same manner.
Cooks’ note:
Cookies keep, layered between sheets of wax paper or parchment, chilled in an airtight container 2 weeks.
*Radish’s note: about rerolling once – whatever it takes to get the least amount of dough wasted. I rerolled more than once and it all turned out okay. This recipe seems too strict for my rebellious liking.
Michael Natkin
Yum! Looks like you got them nice and brown, which I think is one of the keys to improving your home baking. Here’s some other thoughts on the matter:
http://www.herbivoracious.com/2007/08/top-ten-ways-to.html
Jim
I didn’t – and used a small metal cup for the outline, and a tiny kettle top to get the small circles out for the tops of my cookies.
I love this sort of kitchen improvisation. Whenever I pull it off it makes me feel like a real live cook!